Discount codes are a key part of most eCom & Shopify businesses’ marketing strategies. Whether you use them for Black Friday sales, to drive conversions for first-time sales, to increase retention or as part of an affiliate offer, they get a lot of use. So in this article, I’ll go through how to add discount codes to your Shopify checkout automatically for customers.
Shopify is an awesome eCom platform, but the discount code experience for customers can be a bit clunky. On mobile, the discount code box can be hidden so some customers miss it and on desktop customers have to type it and we know the more fiction there is the less likely it is someone will convert. Also when you give discount’s to customers or share them with affiliates, i always think it looks best if the URL is as short and relevant as possible. So i like to create url’s such as yourstore.com/discountname or yourstore.com/partnername, that then redirects to a full URL with UTM tracking and the discount information included.
So below, we’ll go through a neat JavaScript trick I created to automatically apply discount codes to a Shopify cart using URL query strings for my store Oh Crap. Essentially, when a user clicks a link or visits your store with a specific URL, the discount code embedded in that URL is automatically applied to their cart. No manual input needed! Now, let’s dive into how this works.
Automatically Add Discount Codes to Shopify Checkout Using Shopify’s Built-In Functionality
Before I share how you can automatically add discount codes to the Shopify cart from a query string parameter I want to point out Shopify does have a built-in function to add discount codes.
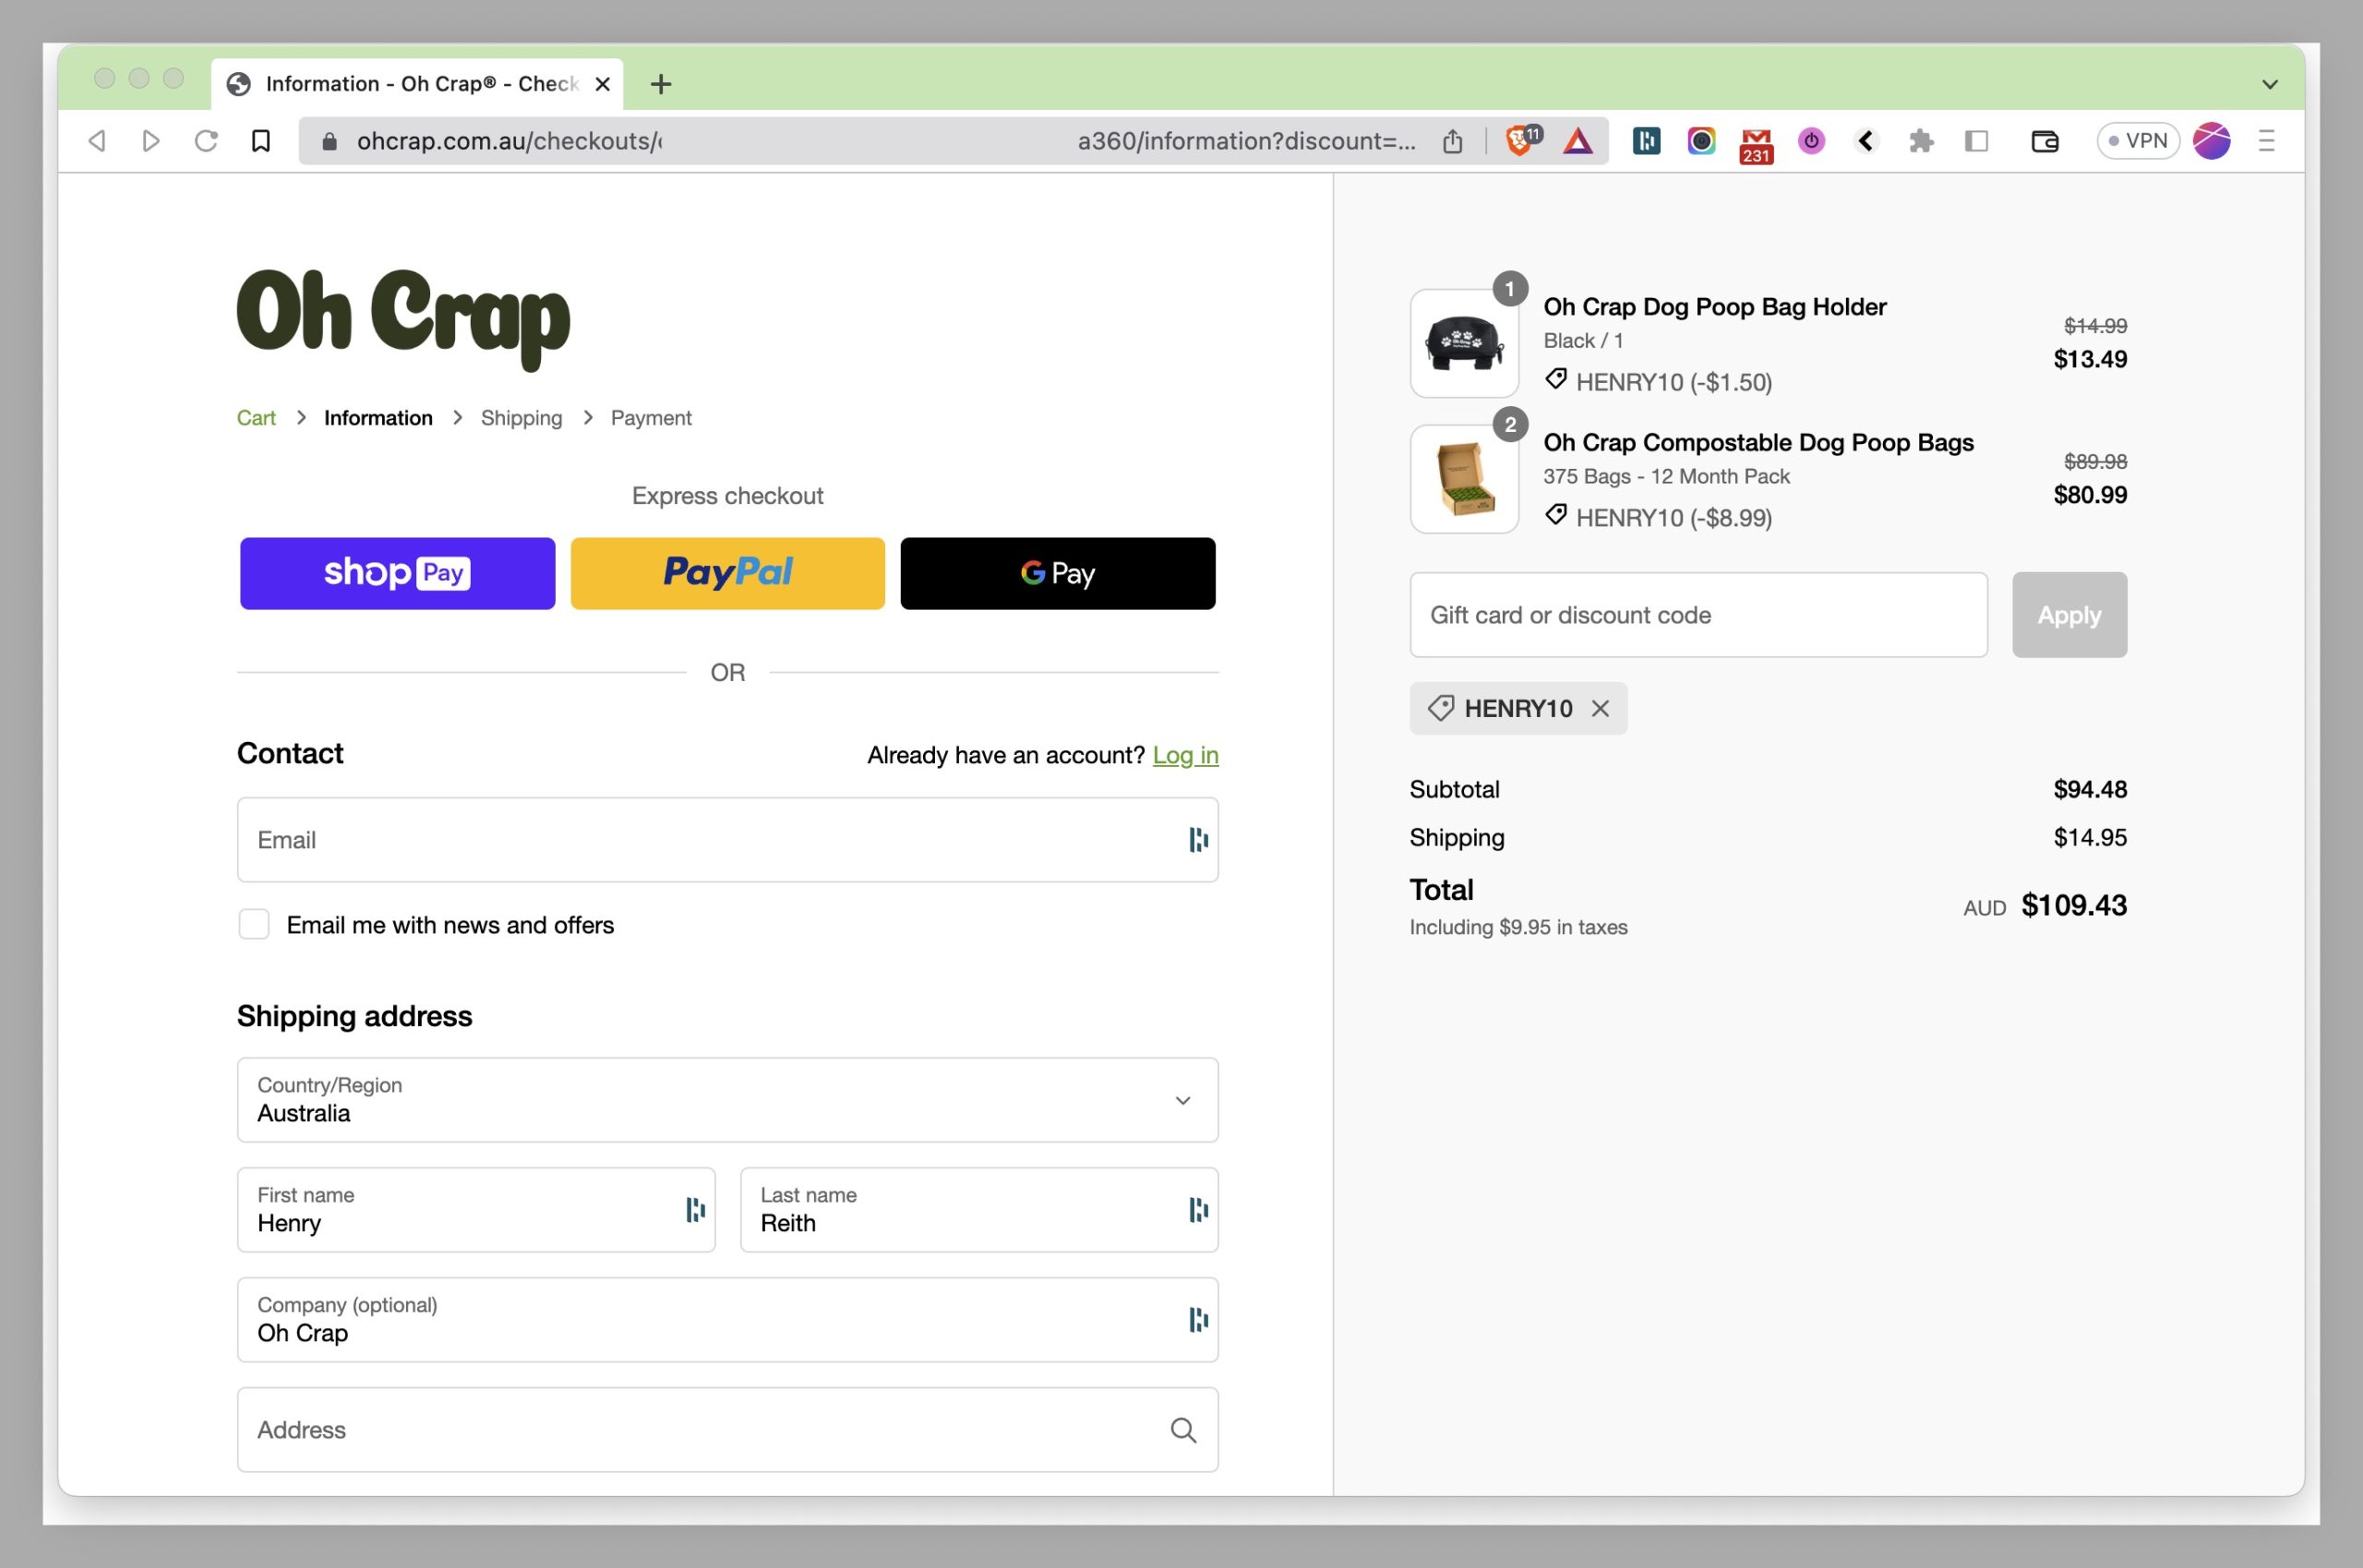
If you go to yourstore.com/discount/[discountcode]/ Shopify will automatically redirect you to the homepage and the discount code will be automatically added at checkout. So if a customer goes to yourstore.com/discount/Henry10/ the discount code Henry10 will be added at checkout & the customer will land on the homepage of your website.
And if you want to redirect customers to go to a particular page on your site, you can include a redirect parameter such as yourstore.com/discount/Save10?redirect=%2Fcollections%2Fall, which will mean customers land on your yourstore.com/collections/all URL.
You can read the full Shopify Docs on this functionality here.
There are also apps that add discount codes to Shopify checkout automatically, but that means that more JS files are added to your site. And slower loading times which are not good for SEO and usability.
However, that just doesn’t look good for customers and adds complications when it comes to adding UTM’s or any other parameters easily. It’s a lot easier to include the discount code in the direct score URL query string. So let’s go through a method to do this below.
Automatically Add Discount Codes to Shopify Checkout With Pure Javascript
Here is the full JS code to automatically add discounts to your Shopify checkout:
This will take the parameter from the discount= query string and add it automatically at checkout. So if your URL is yourstore.com/?discount=Save10 the discount code Save10 will automatically be added at checkout.
You can either add this to the bottom of your theme.liquid file wrapped in < script > tags, or i’ve added to my custom.js theme file.
Now let’s break the code down so you can see what’s going on:
Extracting the Discount Code
The first step in this process is to extract the discount code from the URL. This code could be a part of the URL in a format like https://yourstore.com/?discount=code. Here discount is a URL parameter, and code is the actual discount code.
var urlParams = new URLSearchParams(window.location.search);
var discountCode = urlParams.get('discount');
In the code snippet above, we’re utilising the URLSearchParams API to parse the query string of the current URL (window.location.search). Then, using the get method, we fetch the value of the discount parameter, which is our discount code.
If there is a discount parameter in the URL, the rest of the code is executed.
Storing the Discount Code
The next step is to store this discount code for later use. We do this by saving it in a cookie.
document.cookie = `discount_code=${discountCode}; path=/`;We’re setting a cookie named discount_code with the value of our discount code. The path=/ option ensures the cookie is available across the entire website, so you can use it for elements such as notification bars.
Applying the Discount Code
The final step is to apply this discount code to the user’s cart. We achieve this by sending a GET request to the /discount/{discountCode} endpoint on our server.
fetch(`/discount/${discountCode}`);Here, fetch is a modern, promise-based API for making HTTP requests from the browser. This basically simulates the website visitor visiting Shopify’s automatic discount URL outlined above. This means we get to use all of Shopify’s built-in functionality to add the discount to the checkout automatically.
Conclusion
In this article, we’ve explored how to enhance the shopping experience on your Shopify store by automatically applying discount codes from URL query strings. We’ve broken down the process into three simple steps – extracting the discount code from the URL, storing it in a cookie, and applying it to the user’s cart.
With this knowledge, you can now create promotional links containing discount codes that are automatically applied when clicked by a user.
Have you tried implementing this feature in your Shopify store? Do you have any other unique ways you’re improving your customer’s shopping experience and conversion rates?


0 Comments